Saturday, December 16, 2017

Increasing the size of a ZFS pool by replacing one disk at a time.

My file server at home runs OpenIndiana Hipster and shares data over the local network via SMB. This server has 2 pools:

  • Root ZFS pool (RPOOL) which runs on a single disk and hosts the operating system.
  • Secondary ZFS pool (STORAGE) which is used for file storage. 

This 2nd pool is quickly running out of space.

The storage pool currently uses two 1TB 7200RPM SAS drives which have been configured as a mirrored vdev. The capacity of this mirrored vdev will be enlarged from 1TB to 2TB by individually replacing each 1TB SAS disk with a 2TB SATA disk. ZFS supports doing this while the pool remains online and available.

There are a couple of ways to do this. You could degrade the pool by removing and replacing a disk at a time, but we won't do that as the the primary disk is directly attached to the motherboard and the host bus adapter supports 4 SATA or SAS disks.

The capacity of this server allows for powering it down to attach the 2 additional drives. Only when the disk replacement procedure is fully complete will the original 1TB disks be removed.

The command zpool list -v provides a nice summary of the existing pools and their available space. As you can see below, the 2nd pool is at 93% capacity. Time to do something about that.

# Output of zpool list -v
       
 NAME          SIZE  ALLOC   FREE  EXPANDSZ   FRAG    CAP  DEDUP  HEALTH  ALTROOT
rpool         298G  20.9G   277G         -     1%     7%  1.00x  ONLINE  -
  c4t0d0      298G  20.9G   277G         -     1%     7%
storage       928G   864G  64.3G         -    55%    93%  1.00x  ONLINE  -
  mirror      928G   864G  64.3G         -    55%    93%
    c2t16d0      -      -      -         -      -      -
    c2t17d0      -      -      -         -      -      -


The format command is useful for a number of things. In this case, it can be used to determine which disks are available for use. Here once the list of disks has been displayed, I simply CTRL + C out of program.

# Output of format command:

 AVAILABLE DISK SELECTIONS:
       0. c2t16d0 <WD-WD1001FYYG-01SL3-VR07-931.51GB>
          /pci@0,0/pci8086,2e21@1/pci1000,3090@0/sd@10,0
       1. c2t17d0 <WD-WD1001FYYG-01SL3-VR07-931.51GB>
          /pci@0,0/pci8086,2e21@1/pci1000,3090@0/sd@11,0
       2. c2t18d0 <Hitachi-HUA723020ALA641-MK7OA840 cyl 60798 alt 2 hd 255 sec 252>
          /pci@0,0/pci8086,2e21@1/pci1000,3090@0/sd@12,0
       3. c2t19d0 <ATA-HitachiHUA72302-A840 cyl 60798 alt 2 hd 255 sec 252>
          /pci@0,0/pci8086,2e21@1/pci1000,3090@0/sd@13,0
       4. c4t0d0 <SAMSUNG-HD321KJ-CP100-12-298.09GB>
          /pci@0,0/pci8086,28@1f,2/disk@0,0    
 
From the output above, the 2 new disks are identified as c2t18d0 and c2t19d0. These will be used to replace disks c2t16d0 and c2t17d0.

To ensure the pool will make full use of the extra space, we will need to turn on pool auto-expansion and then check to ensure it's really enabled.

# Enable pool auto-expansion
zpool set autoexpand=on storage

# Verify it's really enabled
zpool get all | grep autoexpand

rpool    autoexpand      off            default
storage  autoexpand      on             local

The zpool replace command is used to replace the first disk. In this command, disk c2t16d0 will be replaced with disk c2t18d0. When the process completes, disk c2t16d0 will automatically be removed from the pool.

# Replace the first disk
zpool replace storage c2t16d0 c2t18d0

Now to check on the progress of the resilvering. This will likely take a couple of hours to complete.

# Check the status
zpool status -v storage

  pool: storage
 state: ONLINE
status: One or more devices is currently being resilvered.  The pool will
        continue to function, possibly in a degraded state.
action: Wait for the resilver to complete.
  scan: resilver in progress since Sat Dec 16 18:03:54 2017
        30.9G scanned out of 864G at 104M/s, 2h16m to go
    30.9G resilvered, 3.58% done
config:

        NAME             STATE     READ WRITE CKSUM
        storage          ONLINE       0     0     0
          mirror-0       ONLINE       0     0     0
            replacing-0  ONLINE       0     0     0
              c2t16d0    ONLINE       0     0     0
              c2t18d0    ONLINE       0     0     0  (resilvering)
            c2t17d0      ONLINE       0     0     0

errors: No known data errors


When resilvering completes, the zpool replace command will be used once more, this time to replace disk c2t17d0 with disk c2t19d0.

zpool replace storage c2t17d0 c2t19d0

The resilvering takes some time to complete, but the output of the command provides a completion estimate. Use the zpool status command to monitor the progress.

# Check the status
zpool status -v storage

  pool: storage
 state: ONLINE
status: One or more devices is currently being resilvered.  The pool will
        continue to function, possibly in a degraded state.
action: Wait for the resilver to complete.
  scan: resilver in progress since Sat Dec 16 21:04:38 2017
        206G scanned out of 864G at 107M/s, 1h45m to go
    206G resilvered, 23.82% done
config:

        NAME             STATE     READ WRITE CKSUM
        storage          ONLINE       0     0     0
          mirror-0       ONLINE       0     0     0
            c2t18d0      ONLINE       0     0     0
            replacing-1  ONLINE       0     0     0
              c2t17d0    ONLINE       0     0     0
              c2t19d0    ONLINE       0     0     0  (resilvering)

errors: No known data errors

When the silvering is done, the status of zpool status -v should look something like this:

zpool status -v storage

  pool: storage
 state: ONLINE
  scan: resilvered 864G in 2h33m with 0 errors on Sat Dec 16 23:38:02 2017
config:

        NAME         STATE     READ WRITE CKSUM
        storage      ONLINE       0     0     0
          mirror-0   ONLINE       0     0     0
            c2t18d0  ONLINE       0     0     0
            c2t19d0  ONLINE       0     0     0

errors: No known data errors

And the output of zpool list -v should now show the increased size of the ZFS pool.

# zpool list -v

NAME          SIZE  ALLOC   FREE  EXPANDSZ   FRAG    CAP  DEDUP  HEALTH  ALTROOT
rpool         298G  20.9G   277G         -     1%     7%  1.00x  ONLINE  -
  c4t0d0      298G  20.9G   277G         -     1%     7%
storage      1.81T   864G   992G         -    27%    46%  1.00x  ONLINE  -
  mirror     1.81T   864G   992G         -    27%    46%
    c2t18d0      -      -      -         -      -      -
    c2t19d0      -      -      -         -      -      -
At this point, the server can be powered and down disks c2t16d0 and c2t17d0 can be removed.

Installing VMware Workstation Player on Linux Mint 18

This is an older post which has been sitting in my drafts folder for over a year. Time to publish it.

To begin, download the vmware workstation player: http://www.vmware.com/products/player/playerpro-evaluation.html

Now open up a terminal and change directory to the location where you saved the vmware bundle.

cd ~/Downloads
sudo chmod +x VMware-Player-12.1.1-3770994.x86_64.bundle
sudo ./VMware-Player-12.1.1-3770994.x86_64.bundle


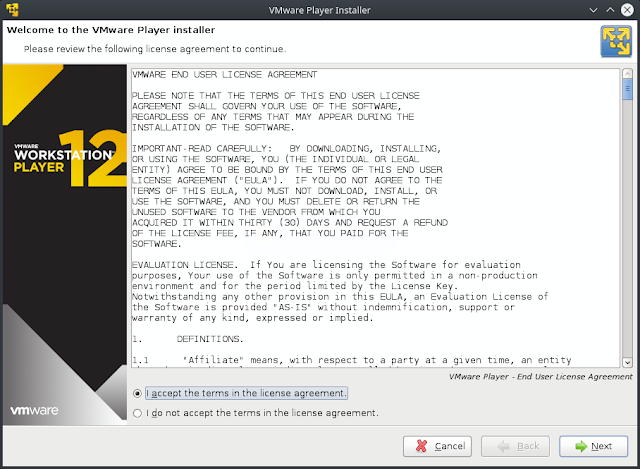
Accept the licensing agreement and click next to continue.


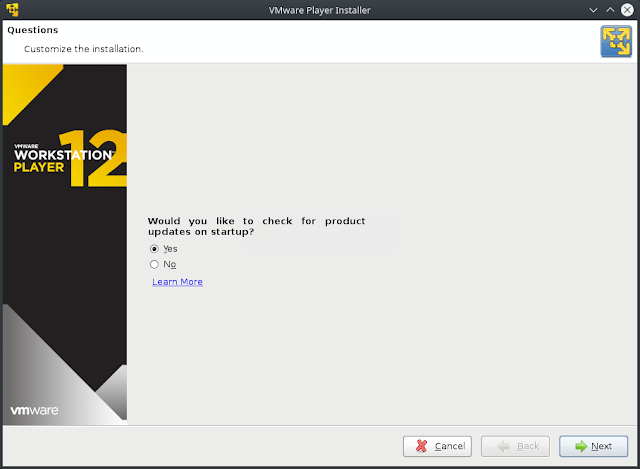
Click yes to keep the product updated. Click next to continue.


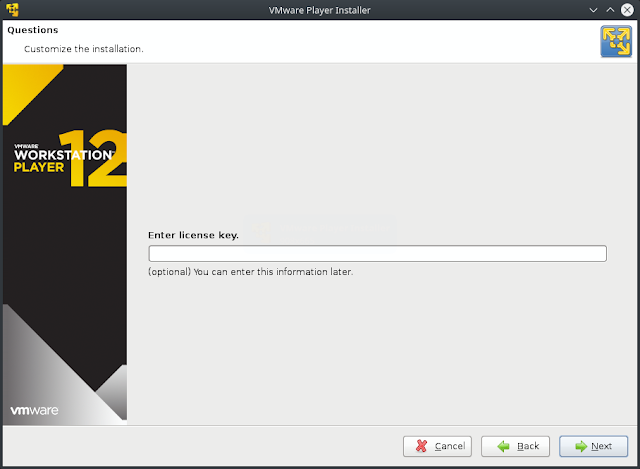
If you have a license key, enter it now. Otherwise click next to continue.


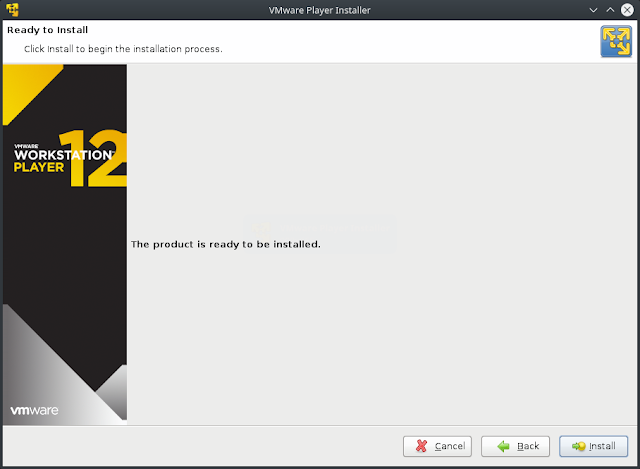
Click install to begin the installation process.


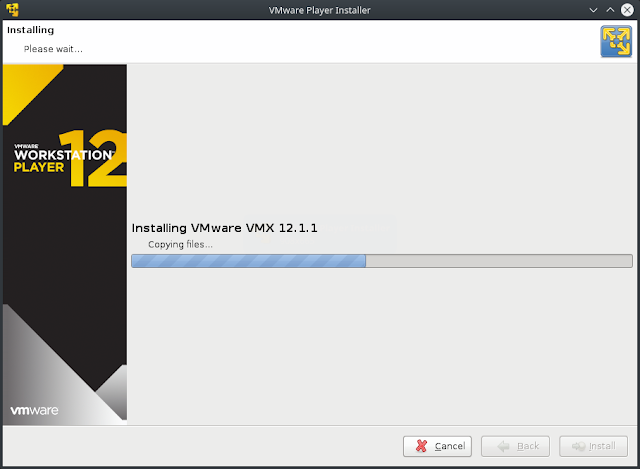
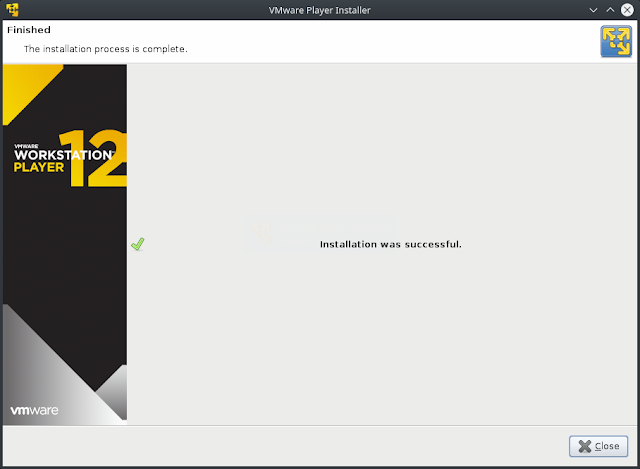
The installation goes fairly quickly.


Click close to exit the installer.

Now locate and launch the icon for vmware player.


When used non-commercially the product requires you to register with your email address. When done, press OK to continue.


Now you are ready to create virtual machines.

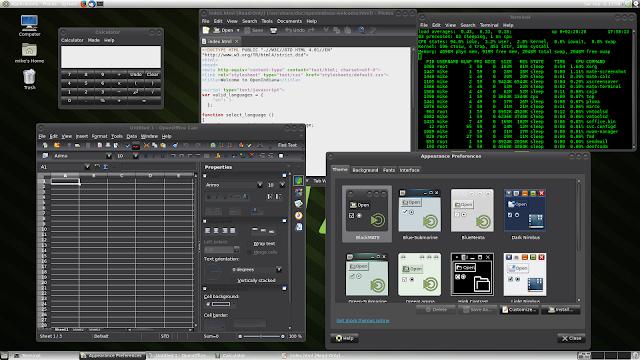
As you can see below I have installed OpenIndiana Hipster (the successor to OpenSolaris) into a new virtual machine and configured the MATE desktop using one of the many included themes. Hipster makes for a great file server with it's native ZFS filesystem.

 OpenIndiana Hipster with MATE Desktop

Saturday, November 18, 2017

Dual booting Centos 7 (build 1708) with Windows 10 and using LXC (Linux Containers)

So, it's been some time since I wrote anything here. Much has changed over the last year, including where I work and where I live. Previously I was providing Windows desktop support in an office setting. Now I am in a much more interesting role with greatly increased responsibilities, helping design and test engineers get things done in a mixed Linux/Windows engineering lab.

Over the past year I have been working hard on learning my new role and getting up to speed on an assortment of different technologies. I've also been working on obtaining some IT certifications.

Last week I passed my CompTIA Security Plus and now I'm studying for the CompTIA Linux Plus. This is just the beginning though. Now that I have an employer willing to pay for my training and certifications, I have many reasons to pursue additional knowledge and understanding. For example, next year I plan to pursue my RHCSA and also work toward an MCSA in Windows Server 2016.

That's not all, I've also been teaching myself EMC networker and Netapp clustering too. To help with all that, I have a lab server running ESXi, setup with lots of VM's and the netapp simulator. As you can see, I've been quite busy.

Anyway, to help with the Linux Plus certification, I decided setup my Lenovo 11e with a dual boot configuration, running Centos 7 alongside Windows 10. And to help ensure I don't trash my Centos while I am learning my way around Linux, I have decided to setup Linux Containers and do my hacking within them.

Linux containers are the Linux analogue to BSD Jails and Solaris Zones. It's operating system level virtualization where the kernel is shared with the container and where the container file system and container processes are isolated from the host operating system. To access the container, you can ssh into it, or log directly onto the console. In any case, performing my work within the containers  should help protect the parent CentOS operating system from any serious blunders on my part.

To dual boot CentOS 7, I first shrunk the main Windows (C:) partition, freeing up about 30GB of space where I would be installing Linux. Then I downloaded RUFUS and used it to write the Centos 7 installer DVD to my USB thumbdrive. When doing all this, I was careful to ensure RUFUS was configured to create a GPT partition for UEFI on the flash drive and to format with the FAT32 file system. This way, Linux would share the /boot/efi partition with Windows.

I also disabled secure boot within the UEFI BIOS on the laptop. I'm not sure this was really necessary for Centos 7, but I did it anyway.

When installing Centos, I chose the "I will configure partitioning" option and then clicked the little link to let the installer automatically assign the partitions using LVM.

I'll admit this part was rather frightening as the disk configuration aspect of the CentOS installer is horribly unintuitive. Furthermore, clicking help only produced an error basically stating there was no help available. Given how critical this step is, the installer should be making every effort to ensure the consequences of every action are abundantly clear. However, that's not the case at all.

Hopefully someday this situation improves but I am not holding my breath waiting for it.

Fortunately, my venture into the uncharted waters of dual boot partitioning worked out OK as the Centos bootloader sees and boots the Windows 10 installation just fine. As for the rest of the installation, I simply selected the GNOME desktop and a few extras. At least that part was a bit more intuitive.

Installing LXC was a bit more difficult as I ran into a few issues.

The first issue I encountered was the systemd-journald process was using up 100% of the CPU whenever a container was running. To solve that I had to add lxc.kmsg = 0 to the end of the file /usr/share/lxc/config/centos.common.conf. After that, the centos container ran normally. If using a different container template, then the file unique to that particular container template would need to be edited. I was using the centos LXC container template.

The 2nd issue I discovered was that LXC could not set the root password for any of the containers I created. To resolve that I had to turn off SELINUX by editing the /etc/selinux/config file and setting SELINUX=disabled. Setting it to permissive would also work. To make the change immediate, I typed the following:

setenforce 0

Then I checked it with:

getenforce

You can also use sestatus to check this.

Perhaps after installing LXC I could have performed an SELINUX relabeling of the file system and rebooted. Maybe that would have solved the problem without needing to disable SELINUX. In any case, I didn't think of that at the time, so I just disabled it.

To install LXC on Centos 7 (build 1708) , I executed the following commands:

yum install epel-release

This was followed by:

yum install lxc lxc-templates lxc-extra

To create my first container I typed:

lxc-create -n centos -t centos

Note: You can also have lxc download the template using the option -t download. This produces a list from which you can select the distribution, version, and architecture.

To start the container within the same terminal window, I typed:

lxc-start -n centos

To launch it as a detached daemon, the -d option would also be used.

To check the status of the container from another terminal window, type:

lxc-info -n centos

For containers running as detached daemons, this allows you to see the IP address so you can SSH into it.

To see the default password used by root account, type:

cat /var/lib/lxc/centos/tmp_root_pass

This may or may not work as not all containers provide a temporary password.

To change the root password prior to starting up the container, type:

chroot /var/lib/lxc/centos/rootfs passwd

Keep in mind the path will differ when using containers with a different name.

To change the root password on a running container, use lxc-attach. This command allows you to execute commands within the container, and launches an attached shell to do so.

lxc-attach -n centos passwd

If you want to list the names of all your containers, type:

lxc-ls

To display additional information about the containers, include the --fancy option.

lxc -ls --fancy

You can shut the container down by doing a poweroff or shutdown -h now from within the container, or you can stop it externally by typing:

lxc-stop -n centos

Well, that's pretty much it.

If you spot any errors, let me know, and I will add corrections as needed.

Update 11/20/2017:  Some useful information about setting the password for the root user:

http://ask.xmodulo.com/reset-password-lxc-container.html


Also, containers are not just limited to Centos. The screenshot above is from Linux Mint 17.2 where I have installed a container running Centos 6.9. Do be aware though, because Mint 17.2 is based on Ubuntu 14.04, the version of lxc it uses, does not support running systemd within the container. So, for example you cannot run Centos 7 using this version of lxc. I suppose you could install a backport, but that's potentially a can of worms, so stick to older releases.