Saturday, December 16, 2017

Increasing the size of a ZFS pool by replacing one disk at a time.

My file server at home runs OpenIndiana Hipster and shares data over the local network via SMB. This server has 2 pools:

  • Root ZFS pool (RPOOL) which runs on a single disk and hosts the operating system.
  • Secondary ZFS pool (STORAGE) which is used for file storage. 

This 2nd pool is quickly running out of space.

The storage pool currently uses two 1TB 7200RPM SAS drives which have been configured as a mirrored vdev. The capacity of this mirrored vdev will be enlarged from 1TB to 2TB by individually replacing each 1TB SAS disk with a 2TB SATA disk. ZFS supports doing this while the pool remains online and available.

There are a couple of ways to do this. You could degrade the pool by removing and replacing a disk at a time, but we won't do that as the the primary disk is directly attached to the motherboard and the host bus adapter supports 4 SATA or SAS disks.

The capacity of this server allows for powering it down to attach the 2 additional drives. Only when the disk replacement procedure is fully complete will the original 1TB disks be removed.

The command zpool list -v provides a nice summary of the existing pools and their available space. As you can see below, the 2nd pool is at 93% capacity. Time to do something about that.

# Output of zpool list -v
       
 NAME          SIZE  ALLOC   FREE  EXPANDSZ   FRAG    CAP  DEDUP  HEALTH  ALTROOT
rpool         298G  20.9G   277G         -     1%     7%  1.00x  ONLINE  -
  c4t0d0      298G  20.9G   277G         -     1%     7%
storage       928G   864G  64.3G         -    55%    93%  1.00x  ONLINE  -
  mirror      928G   864G  64.3G         -    55%    93%
    c2t16d0      -      -      -         -      -      -
    c2t17d0      -      -      -         -      -      -


The format command is useful for a number of things. In this case, it can be used to determine which disks are available for use. Here once the list of disks has been displayed, I simply CTRL + C out of program.

# Output of format command:

 AVAILABLE DISK SELECTIONS:
       0. c2t16d0 <WD-WD1001FYYG-01SL3-VR07-931.51GB>
          /pci@0,0/pci8086,2e21@1/pci1000,3090@0/sd@10,0
       1. c2t17d0 <WD-WD1001FYYG-01SL3-VR07-931.51GB>
          /pci@0,0/pci8086,2e21@1/pci1000,3090@0/sd@11,0
       2. c2t18d0 <Hitachi-HUA723020ALA641-MK7OA840 cyl 60798 alt 2 hd 255 sec 252>
          /pci@0,0/pci8086,2e21@1/pci1000,3090@0/sd@12,0
       3. c2t19d0 <ATA-HitachiHUA72302-A840 cyl 60798 alt 2 hd 255 sec 252>
          /pci@0,0/pci8086,2e21@1/pci1000,3090@0/sd@13,0
       4. c4t0d0 <SAMSUNG-HD321KJ-CP100-12-298.09GB>
          /pci@0,0/pci8086,28@1f,2/disk@0,0    
 
From the output above, the 2 new disks are identified as c2t18d0 and c2t19d0. These will be used to replace disks c2t16d0 and c2t17d0.

To ensure the pool will make full use of the extra space, we will need to turn on pool auto-expansion and then check to ensure it's really enabled.

# Enable pool auto-expansion
zpool set autoexpand=on storage

# Verify it's really enabled
zpool get all | grep autoexpand

rpool    autoexpand      off            default
storage  autoexpand      on             local

The zpool replace command is used to replace the first disk. In this command, disk c2t16d0 will be replaced with disk c2t18d0. When the process completes, disk c2t16d0 will automatically be removed from the pool.

# Replace the first disk
zpool replace storage c2t16d0 c2t18d0

Now to check on the progress of the resilvering. This will likely take a couple of hours to complete.

# Check the status
zpool status -v storage

  pool: storage
 state: ONLINE
status: One or more devices is currently being resilvered.  The pool will
        continue to function, possibly in a degraded state.
action: Wait for the resilver to complete.
  scan: resilver in progress since Sat Dec 16 18:03:54 2017
        30.9G scanned out of 864G at 104M/s, 2h16m to go
    30.9G resilvered, 3.58% done
config:

        NAME             STATE     READ WRITE CKSUM
        storage          ONLINE       0     0     0
          mirror-0       ONLINE       0     0     0
            replacing-0  ONLINE       0     0     0
              c2t16d0    ONLINE       0     0     0
              c2t18d0    ONLINE       0     0     0  (resilvering)
            c2t17d0      ONLINE       0     0     0

errors: No known data errors


When resilvering completes, the zpool replace command will be used once more, this time to replace disk c2t17d0 with disk c2t19d0.

zpool replace storage c2t17d0 c2t19d0

The resilvering takes some time to complete, but the output of the command provides a completion estimate. Use the zpool status command to monitor the progress.

# Check the status
zpool status -v storage

  pool: storage
 state: ONLINE
status: One or more devices is currently being resilvered.  The pool will
        continue to function, possibly in a degraded state.
action: Wait for the resilver to complete.
  scan: resilver in progress since Sat Dec 16 21:04:38 2017
        206G scanned out of 864G at 107M/s, 1h45m to go
    206G resilvered, 23.82% done
config:

        NAME             STATE     READ WRITE CKSUM
        storage          ONLINE       0     0     0
          mirror-0       ONLINE       0     0     0
            c2t18d0      ONLINE       0     0     0
            replacing-1  ONLINE       0     0     0
              c2t17d0    ONLINE       0     0     0
              c2t19d0    ONLINE       0     0     0  (resilvering)

errors: No known data errors

When the silvering is done, the status of zpool status -v should look something like this:

zpool status -v storage

  pool: storage
 state: ONLINE
  scan: resilvered 864G in 2h33m with 0 errors on Sat Dec 16 23:38:02 2017
config:

        NAME         STATE     READ WRITE CKSUM
        storage      ONLINE       0     0     0
          mirror-0   ONLINE       0     0     0
            c2t18d0  ONLINE       0     0     0
            c2t19d0  ONLINE       0     0     0

errors: No known data errors

And the output of zpool list -v should now show the increased size of the ZFS pool.

# zpool list -v

NAME          SIZE  ALLOC   FREE  EXPANDSZ   FRAG    CAP  DEDUP  HEALTH  ALTROOT
rpool         298G  20.9G   277G         -     1%     7%  1.00x  ONLINE  -
  c4t0d0      298G  20.9G   277G         -     1%     7%
storage      1.81T   864G   992G         -    27%    46%  1.00x  ONLINE  -
  mirror     1.81T   864G   992G         -    27%    46%
    c2t18d0      -      -      -         -      -      -
    c2t19d0      -      -      -         -      -      -
At this point, the server can be powered and down disks c2t16d0 and c2t17d0 can be removed.

Installing VMware Workstation Player on Linux Mint 18

This is an older post which has been sitting in my drafts folder for over a year. Time to publish it.

To begin, download the vmware workstation player: http://www.vmware.com/products/player/playerpro-evaluation.html

Now open up a terminal and change directory to the location where you saved the vmware bundle.

cd ~/Downloads
sudo chmod +x VMware-Player-12.1.1-3770994.x86_64.bundle
sudo ./VMware-Player-12.1.1-3770994.x86_64.bundle


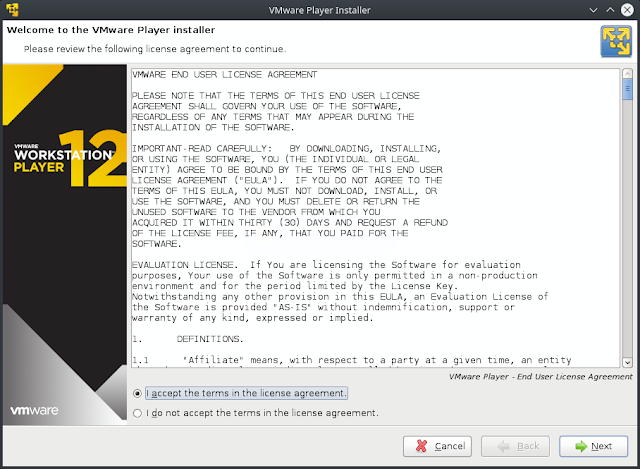
Accept the licensing agreement and click next to continue.


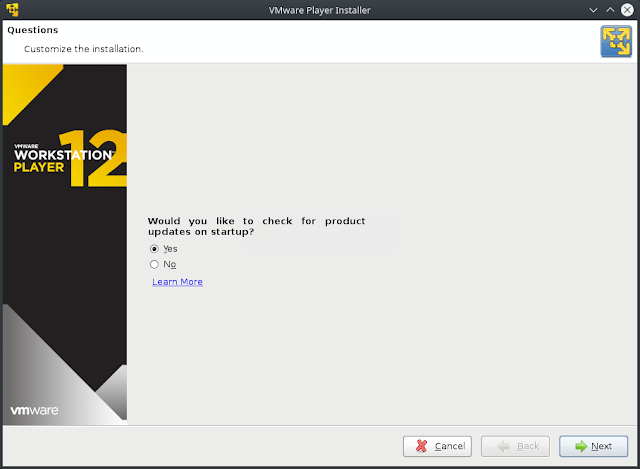
Click yes to keep the product updated. Click next to continue.


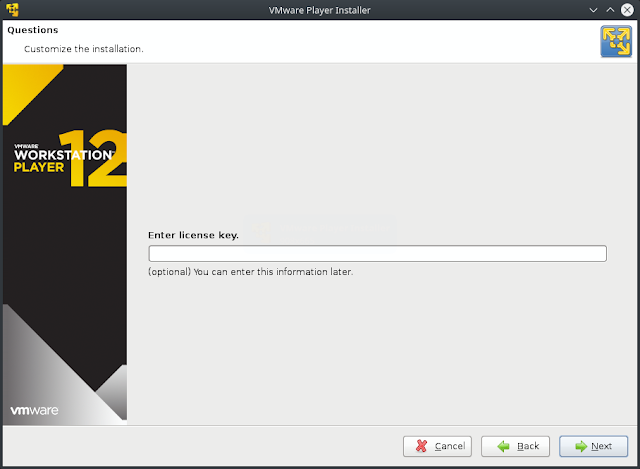
If you have a license key, enter it now. Otherwise click next to continue.


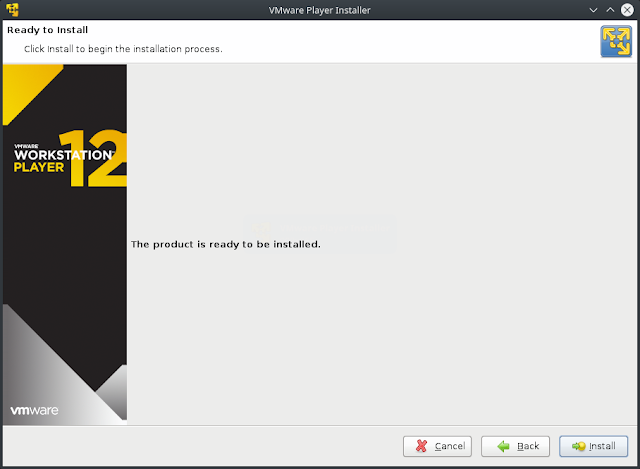
Click install to begin the installation process.


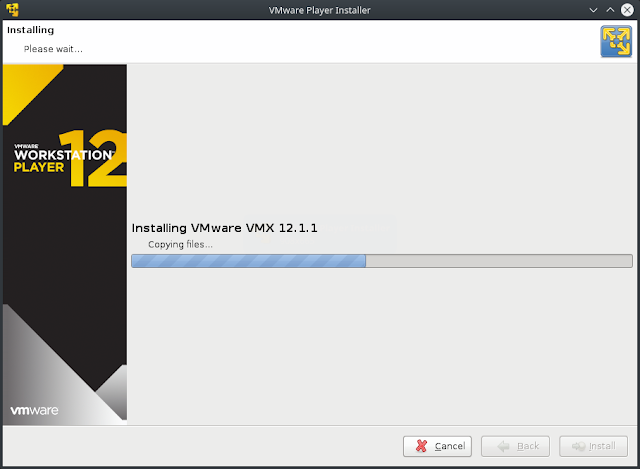
The installation goes fairly quickly.


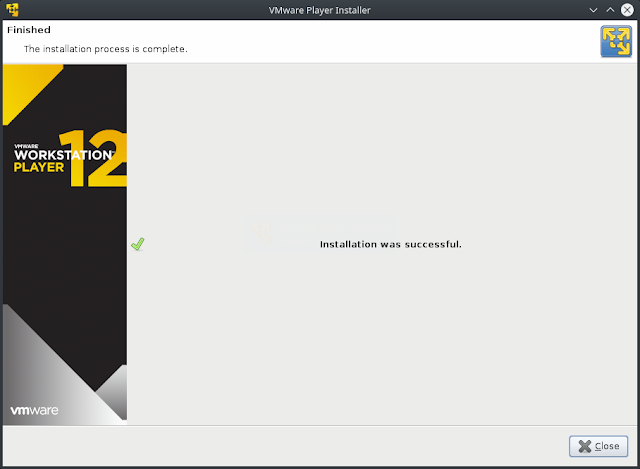
Click close to exit the installer.

Now locate and launch the icon for vmware player.


When used non-commercially the product requires you to register with your email address. When done, press OK to continue.


Now you are ready to create virtual machines.

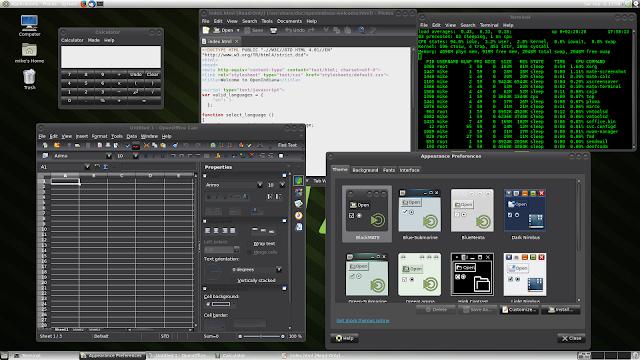
As you can see below I have installed OpenIndiana Hipster (the successor to OpenSolaris) into a new virtual machine and configured the MATE desktop using one of the many included themes. Hipster makes for a great file server with it's native ZFS filesystem.

 OpenIndiana Hipster with MATE Desktop

Saturday, November 18, 2017

Dual booting Centos 7 (build 1708) with Windows 10 and using LXC (Linux Containers)

So, it's been some time since I wrote anything here. Much has changed over the last year, including where I work and where I live. Previously I was providing Windows desktop support in an office setting. Now I am in a much more interesting role with greatly increased responsibilities, helping design and test engineers get things done in a mixed Linux/Windows engineering lab.

Over the past year I have been working hard on learning my new role and getting up to speed on an assortment of different technologies. I've also been working on obtaining some IT certifications.

Last week I passed my CompTIA Security Plus and now I'm studying for the CompTIA Linux Plus. This is just the beginning though. Now that I have an employer willing to pay for my training and certifications, I have many reasons to pursue additional knowledge and understanding. For example, next year I plan to pursue my RHCSA and also work toward an MCSA in Windows Server 2016.

That's not all, I've also been teaching myself EMC networker and Netapp clustering too. To help with all that, I have a lab server running ESXi, setup with lots of VM's and the netapp simulator. As you can see, I've been quite busy.

Anyway, to help with the Linux Plus certification, I decided setup my Lenovo 11e with a dual boot configuration, running Centos 7 alongside Windows 10. And to help ensure I don't trash my Centos while I am learning my way around Linux, I have decided to setup Linux Containers and do my hacking within them.

Linux containers are the Linux analogue to BSD Jails and Solaris Zones. It's operating system level virtualization where the kernel is shared with the container and where the container file system and container processes are isolated from the host operating system. To access the container, you can ssh into it, or log directly onto the console. In any case, performing my work within the containers  should help protect the parent CentOS operating system from any serious blunders on my part.

To dual boot CentOS 7, I first shrunk the main Windows (C:) partition, freeing up about 30GB of space where I would be installing Linux. Then I downloaded RUFUS and used it to write the Centos 7 installer DVD to my USB thumbdrive. When doing all this, I was careful to ensure RUFUS was configured to create a GPT partition for UEFI on the flash drive and to format with the FAT32 file system. This way, Linux would share the /boot/efi partition with Windows.

I also disabled secure boot within the UEFI BIOS on the laptop. I'm not sure this was really necessary for Centos 7, but I did it anyway.

When installing Centos, I chose the "I will configure partitioning" option and then clicked the little link to let the installer automatically assign the partitions using LVM.

I'll admit this part was rather frightening as the disk configuration aspect of the CentOS installer is horribly unintuitive. Furthermore, clicking help only produced an error basically stating there was no help available. Given how critical this step is, the installer should be making every effort to ensure the consequences of every action are abundantly clear. However, that's not the case at all.

Hopefully someday this situation improves but I am not holding my breath waiting for it.

Fortunately, my venture into the uncharted waters of dual boot partitioning worked out OK as the Centos bootloader sees and boots the Windows 10 installation just fine. As for the rest of the installation, I simply selected the GNOME desktop and a few extras. At least that part was a bit more intuitive.

Installing LXC was a bit more difficult as I ran into a few issues.

The first issue I encountered was the systemd-journald process was using up 100% of the CPU whenever a container was running. To solve that I had to add lxc.kmsg = 0 to the end of the file /usr/share/lxc/config/centos.common.conf. After that, the centos container ran normally. If using a different container template, then the file unique to that particular container template would need to be edited. I was using the centos LXC container template.

The 2nd issue I discovered was that LXC could not set the root password for any of the containers I created. To resolve that I had to turn off SELINUX by editing the /etc/selinux/config file and setting SELINUX=disabled. Setting it to permissive would also work. To make the change immediate, I typed the following:

setenforce 0

Then I checked it with:

getenforce

You can also use sestatus to check this.

Perhaps after installing LXC I could have performed an SELINUX relabeling of the file system and rebooted. Maybe that would have solved the problem without needing to disable SELINUX. In any case, I didn't think of that at the time, so I just disabled it.

To install LXC on Centos 7 (build 1708) , I executed the following commands:

yum install epel-release

This was followed by:

yum install lxc lxc-templates lxc-extra

To create my first container I typed:

lxc-create -n centos -t centos

Note: You can also have lxc download the template using the option -t download. This produces a list from which you can select the distribution, version, and architecture.

To start the container within the same terminal window, I typed:

lxc-start -n centos

To launch it as a detached daemon, the -d option would also be used.

To check the status of the container from another terminal window, type:

lxc-info -n centos

For containers running as detached daemons, this allows you to see the IP address so you can SSH into it.

To see the default password used by root account, type:

cat /var/lib/lxc/centos/tmp_root_pass

This may or may not work as not all containers provide a temporary password.

To change the root password prior to starting up the container, type:

chroot /var/lib/lxc/centos/rootfs passwd

Keep in mind the path will differ when using containers with a different name.

To change the root password on a running container, use lxc-attach. This command allows you to execute commands within the container, and launches an attached shell to do so.

lxc-attach -n centos passwd

If you want to list the names of all your containers, type:

lxc-ls

To display additional information about the containers, include the --fancy option.

lxc -ls --fancy

You can shut the container down by doing a poweroff or shutdown -h now from within the container, or you can stop it externally by typing:

lxc-stop -n centos

Well, that's pretty much it.

If you spot any errors, let me know, and I will add corrections as needed.

Update 11/20/2017:  Some useful information about setting the password for the root user:

http://ask.xmodulo.com/reset-password-lxc-container.html


Also, containers are not just limited to Centos. The screenshot above is from Linux Mint 17.2 where I have installed a container running Centos 6.9. Do be aware though, because Mint 17.2 is based on Ubuntu 14.04, the version of lxc it uses, does not support running systemd within the container. So, for example you cannot run Centos 7 using this version of lxc. I suppose you could install a backport, but that's potentially a can of worms, so stick to older releases.


Sunday, December 4, 2016

Installing MkDocs on Fedora 25


As mentioned in previous posts, I've been helping the OpenIndiana project with updating their end user systems documentation. The existing documentation site uses a WIKI, but it's been neglected for several years and has become outdated. With the OpenIndiana distribution experiencing something of a renaissance over the past year, the poor state of the end user documentation has become all the more apparent.

To that end, I've assisted the project with a documentation revitalization initiative. We now have an MkDocs site served from Github pages (https://docs.openindiana.org) and all documentation now resides on GitHub (https://github.com/OpenIndiana/oi-docs). Using Travis-CI, the site gets automatically pushed whenever we make a commit. It's a splendid example of continuous integration.

Currently we're in the process of reviewing and migrating content from the old WIKI to the new platform, but that's going to take some time to complete. Hopefully within the next year we'll complete this effort.

To assist with this process I have been using a Lenovo W500 laptop running Linux Mint 17.2 KDE as my primary workstation. It works pretty well for writing documentation, but it's not really optimal for spending long hours running virtual machines and writing documentation. A newer and more powerful system with a mechanical keyboard is far more ideal.

To that end I picked up an ASROCK Deskmini which is running a new Intel i3-6100 dual core with hyperthreading. This system is significantly faster than my old laptop with it's rather dated core 2 duo. To that I have added a nice Samsung 24 inch wide screen LCD monitor and a Tesoro mechanical keyboard (with Cherry brown switches). I love the new system. It's fast, modern, and powerful. It's quite energy efficient as well.

While the old laptop was running Linux Mint 17.2, I've been wanting to move away from the Debian world and back into the Redhat based world. While I love Linux Mint and will sorely miss it, I'm doing this because where I work we're primarily a Redhat shop and I need to get up to speed supporting a Redhat based environment.

I would have installed Centos 7 on the new machine, but discovered the hardware is too new for Centos 7. It would not install. Fortunately the KDE spin of Fedora 25 installed without much fuss.

So, here we are on a nice shiny new system running Fedora 25 and now we need to install a few things to optimize it as a documentation generating platform.


First....I gotta have Chromium. Firefox just isn't going to cut it.

sudo dnf install chromium


Next on the list is Vim. While Kate is nice, I feel more at home in Vim.

sudo dnf install vim


To write docs, I'm going to need a few more things as well. We're going to need GIT, Ruby Gems, and MkDocs along with the bootswatch themes.

We'll start with Ruby Gems and GIT.

sudo dnf install rubygems git


Now for MkDocs and the bootswatch themes:

sudo pip install mkdocs mkdocs-bootswatch


And so I can validate the markdown used for MkDocs, I'll also install MarkDown Lint.

sudo gem install mdl


There you go. Everything which is required for writing docs for the OpenIndiana Project. If you care to join in on the fun, shoot us an email: Docs AT OpenIndiana.org

Wednesday, August 24, 2016

Installing MKDOCS on Linux Mint 18

The OpenIndiana Project is migrating over to MKDOCS as it's documentation platform and I have been using it for a few months now on both OpenIndiana Hipster as well as on Linux Mint 17.2 and 17.3. Installing all the pieces can sometimes incur some pain, but I have documented the process and it generally goes pretty well.

This past week however, I built a new machine and installed the beta of Linux Mint 18 with KDE 5. So naturally I tried to install MKDOCS...which didn't go so well.

Initially I tried doing a 'sudo pip install mkdocs' and that failed at several different points. And somehow pip was having troubles installing a prerequisite (setuptools). Also, PIP was complaining about being outdated, but I could not get past the 2nd set of errors:

error: invalid command 'bdist_wheel'

So, then I tried installing the native packaged version and found it was so old (version .014) that it did not properly render the site theme.

In the end the solution was to install the python 3 version of pip and use pip3 to install the software. I still had to upgrade setuptools first though. Not sure what that is all about as I have installed MKDOCS a dozen times on OpenIndiana and Linux Mint 17.x and never run into it before. And PIP was still complaining about being outdated, so I upgraded it.

If you follow the steps below, it should all work just fine for you.

$ sudo pip3 install setuptools
$ sudo pip3 install --upgrade pip
$ sudo pip3 install mkdocs

$ mkdocs --version
mkdocs, version 0.15.3

Sunday, August 21, 2016

OpenIndiana on VMware ESXI

While a little dated (circa 2012), I found some very interesting information about installing and running OpenIndiana on VMware ESXI. It covers the following topics:

  • Background information about OpenIndiana and OS installation
  • Network configuration and Setting up storage
  • Presenting storage to your Hosts with iSCSI and/or NFS
  • Performance testing

For more information see the following blog posts:

OpenIndiana Installation walkthrough - Part 1

OpenIndiana Installation walkthrough - Part 2

OpenIndiana Installation walkthrough - Part 3

OpenIndiana Installation walkthrough - Part 4

Sunday, April 24, 2016

Installing Awestruct on Linux Mint 17.x

Installing Awestruct on Linux Mint 17.x

Installing Awestruct on Linux Mint 17.x

Introduction

The instructions from the Awestruct website assume quite a bit of existing knowledge. As a result, many of steps lack all the necessary information to complete the task. The notes below may help to fill in some of the blanks and should help you get things going.

Prerequisites

Install GIT & Curl

If you haven’t already done so, install GIT so you can version control your project. Curl will be used to install RVM (assuming you select method # 2 below).

sudo apt-get install git curl
Install a Ruby build environment

To use Awestruct, you essentially need to install a complete Ruby build environment. The latest version of Awestruct requires Ruby version 2.0 (or greater), and to build these things, you also require ruby2.0-dev (or greater).

Installing a Ruby development environment

There are 2 ways to approach this task:

Method # 1 - System Level

  • Using this method, you will be installing or upgrading your Ruby environment at the system level, which will affect all users of the machine.

    • This method also requires the use of sudo for installing gems, etc.

You can search the apt cache to see what versions are available by doing an apt-cache search ruby2 You can check your existing version of Ruby using ruby -v and listing installed gems with gem2.0 list.

The following commands should get things installed OK.

sudo apt-get install ruby2.0 ruby2.0-dev

Next install Awestruct:

sudo gem2.0 install awestruct

Method # 2 - User Level - (preferred method)

  • Use RVM (Ruby Version Manager)

This is probably the best way to manage a Ruby build environment as it installs everything right into your own home directory. Not only that, but you are then able to install gems without having to elevate permissions using sudo.

To get this to work correctly, I had to do a number of things.

Install the RVM key
gpg2 --keyserver hkp://keys.gnupg.net --recv-keys 409B6B1796C275462A1703113804BB82D39DC0E3
Install RVM
curl -L https://get.rvm.io | bash -s stable --ruby=2.3.0

Here is what things looked like when I installed RVM on Linux Mint 17.3.

$~> curl -L https://get.rvm.io | bash -s stable --ruby=2.3.0
  % Total    % Received % Xferd  Average Speed   Time    Time     Time  Current
                                 Dload  Upload   Total   Spent    Left  Speed
100   184  100   184    0     0    724      0 --:--:-- --:--:-- --:--:--   724
100 22865  100 22865    0     0  51150      0 --:--:-- --:--:-- --:--:-- 51150
Downloading https://github.com/rvm/rvm/archive/1.27.0.tar.gz
Downloading https://github.com/rvm/rvm/releases/download/1.27.0/1.27.0.tar.gz.asc
gpg: Signature made Tue 29 Mar 2016 09:49:47 AM EDT using RSA key ID BF04FF17
gpg: Good signature from "Michal Papis (RVM signing) <mpapis@gmail.com>"
gpg: WARNING: This key is not certified with a trusted signature!
gpg:          There is no indication that the signature belongs to the owner.
Primary key fingerprint: 409B 6B17 96C2 7546 2A17  0311 3804 BB82 D39D C0E3
     Subkey fingerprint: 62C9 E5F4 DA30 0D94 AC36  166B E206 C29F BF04 FF17
GPG verified '/home/mike/.rvm/archives/rvm-1.27.0.tgz'

Installing RVM to /home/mike/.rvm/
    Adding rvm PATH line to /home/mike/.profile /home/mike/.mkshrc /home/mike/.bashrc /home/mike/.zshrc.
    Adding rvm loading line to /home/mike/.profile /home/mike/.bash_profile /home/mike/.zlogin.
Installation of RVM in /home/mike/.rvm/ is almost complete:

  * To start using RVM you need to run `source /home/mike/.rvm/scripts/rvm`
    in all your open shell windows, in rare cases you need to reopen all shell windows.

# Michael,
#
#   Thank you for using RVM!
#   We sincerely hope that RVM helps to make your life easier and more enjoyable!!!
#
# ~Wayne, Michal & team.

In case of problems: https://rvm.io/help and https://twitter.com/rvm_io
rvm 1.27.0 (latest) by Wayne E. Seguin <wayneeseguin@gmail.com>, Michal Papis <mpapis@gmail.com> [https://rvm.io/]
Searching for binary rubies, this might take some time.
No binary rubies available for: mint/17.3/x86_64/ruby-2.3.0.
Continuing with compilation. Please read 'rvm help mount' to get more information on binary rubies.
Checking requirements for mint.
Installing requirements for mint.
Updating system...........
Installing required packages: libreadline6-dev, zlib1g-dev, libssl-dev, libyaml-dev, libsqlite3-dev, sqlite3, autoconf, libgmp-dev, libgdbm-dev, libncurses5-dev, automake, libtool, bison, libffi-dev............|
Requirements installation successful.
Found user configured '-j' flag in 'rvm_make_flags', please note that RVM can detect number of CPU threads and set the '-j' flag automatically if you do not set it.
Installing Ruby from source to: /home/mike/.rvm/rubies/ruby-2.3.0, this may take a while depending on your cpu(s)...
ruby-2.3.0 - #downloading ruby-2.3.0, this may take a while depending on your connection...
  % Total    % Received % Xferd  Average Speed   Time    Time     Time  Current
                                 Dload  Upload   Total   Spent    Left  Speed
100 13.5M  100 13.5M    0     0  2905k      0  0:00:04  0:00:04 --:--:-- 2906k
ruby-2.3.0 - #extracting ruby-2.3.0 to /home/mike/.rvm/src/ruby-2.3.0....
ruby-2.3.0 - #configuring..........................................................
ruby-2.3.0 - #post-configuration..
ruby-2.3.0 - #compiling.................................................................................
ruby-2.3.0 - #installing...........................
ruby-2.3.0 - #making binaries executable..
Installed rubygems 2.5.1 is newer than 2.4.8 provided with installed ruby, skipping installation, use --force to force installation.
ruby-2.3.0 - #gemset created /home/mike/.rvm/gems/ruby-2.3.0@global
ruby-2.3.0 - #importing gemset /home/mike/.rvm/gemsets/global.gems...............................................
ruby-2.3.0 - #generating global wrappers........
ruby-2.3.0 - #gemset created /home/mike/.rvm/gems/ruby-2.3.0
ruby-2.3.0 - #importing gemsetfile /home/mike/.rvm/gemsets/default.gems evaluated to empty gem list
ruby-2.3.0 - #generating default wrappers........
ruby-2.3.0 - #adjusting #shebangs for (gem irb erb ri rdoc testrb rake).
Install of ruby-2.3.0 - #complete
Ruby was built without documentation, to build it run: rvm docs generate-ri
Creating alias default for ruby-2.3.0...

  * To start using RVM you need to run `source /home/mike/.rvm/scripts/rvm`
    in all your open shell windows, in rare cases you need to reopen all shell windows.
Sourcing the RVM directory

When you installed RVM, one of the things the installer did was add a path statement to the end of your .bashrc file.

#export PATH="$PATH:$HOME/.rvm/bin" # Add RVM to PATH for scripting

Personally I didn’t have much luck getting this to work unless I explicitly sourced it each and every time I opened a new shell.

Well, that’s far too much work (and something I won’t always remember to do), so I ended up replacing it with the following function. Comment out the line installed by RVM and following that line, paste in the function shown below.

# Load RVM into a shell session *as a function*
if [[ -s "$HOME/.rvm/scripts/rvm" ]] ; then

# First try to load from a user install
  source "$HOME/.rvm/scripts/rvm"

elif [[ -s "/usr/local/rvm/scripts/rvm" ]] ; then

# Then try to load from a root install
  source "/usr/local/rvm/scripts/rvm"

else

  printf "ERROR: An RVM installation was not found.\n"

fi

Now source your ~/.basrc or restart your shell. From this point forward, you should never have to do this again.

To help you determine whether RVM has been properly sourced, perform a which ruby or which gem. The which command will return the respective path to the binary executable (which in this case, should be to your ~/.rvm directory).

Now that we have a build environment established, and the path to the ~/.rvm directory has been sourced, we can go ahead with installing Awestruct and Bundler.

Installing Awestruct, Bundler, and Rake

gem install awestruct bundler rake

On my system (Linux Mint 17.3), this installed a whole lot of things.

$~> gem install awestruct bundler rake
Fetching: tilt-2.0.2.gem (100%)
Successfully installed tilt-2.0.2
Fetching: netrc-0.11.0.gem (100%)
Successfully installed netrc-0.11.0
Fetching: mime-types-2.99.1.gem (100%)
Successfully installed mime-types-2.99.1
Fetching: unf_ext-0.0.7.2.gem (100%)
Building native extensions.  This could take a while...
Successfully installed unf_ext-0.0.7.2
Fetching: unf-0.1.4.gem (100%)
Successfully installed unf-0.1.4
Fetching: domain_name-0.5.20160310.gem (100%)
Successfully installed domain_name-0.5.20160310
Fetching: http-cookie-1.0.2.gem (100%)
Successfully installed http-cookie-1.0.2
Fetching: rest-client-1.8.0.gem (100%)
Successfully installed rest-client-1.8.0
Fetching: rack-1.6.4.gem (100%)
Successfully installed rack-1.6.4
Fetching: parallel-1.8.0.gem (100%)
Successfully installed parallel-1.8.0
Fetching: ast-2.2.0.gem (100%)
Successfully installed ast-2.2.0
Fetching: ansi-1.5.0.gem (100%)
Successfully installed ansi-1.5.0
Fetching: ruby-ll-2.1.2.gem (100%)
Building native extensions.  This could take a while...
Successfully installed ruby-ll-2.1.2
Fetching: oga-1.3.1.gem (100%)
Building native extensions.  This could take a while...
Successfully installed oga-1.3.1
Fetching: multi_json-1.11.2.gem (100%)
Successfully installed multi_json-1.11.2
Fetching: little-plugger-1.1.4.gem (100%)
Successfully installed little-plugger-1.1.4
Fetching: logging-2.1.0.gem (100%)
Successfully installed logging-2.1.0
Fetching: ffi-1.9.10.gem (100%)
Building native extensions.  This could take a while...
Successfully installed ffi-1.9.10
Fetching: rb-inotify-0.9.7.gem (100%)
Successfully installed rb-inotify-0.9.7
Fetching: rb-fsevent-0.9.7.gem (100%)
Successfully installed rb-fsevent-0.9.7
Fetching: listen-3.1.1.gem (100%)
Successfully installed listen-3.1.1
Fetching: haml-4.0.7.gem (100%)

HEADS UP! Haml 4.0 has many improvements, but also has changes that may break
your application:

* Support for Ruby 1.8.6 dropped
* Support for Rails 2 dropped
* Sass filter now always outputs <style> tags
* Data attributes are now hyphenated, not underscored
* html2haml utility moved to the html2haml gem
* Textile and Maruku filters moved to the haml-contrib gem

For more info see:

http://rubydoc.info/github/haml/haml/file/CHANGELOG.md

Successfully installed haml-4.0.7
Fetching: guard-compat-1.2.1.gem (100%)
Successfully installed guard-compat-1.2.1
Fetching: thor-0.19.1.gem (100%)
Successfully installed thor-0.19.1
Fetching: shellany-0.0.1.gem (100%)
Successfully installed shellany-0.0.1
Fetching: slop-3.6.0.gem (100%)
Successfully installed slop-3.6.0
Fetching: method_source-0.8.2.gem (100%)
Successfully installed method_source-0.8.2
Fetching: coderay-1.1.1.gem (100%)
Successfully installed coderay-1.1.1
Fetching: pry-0.10.3.gem (100%)
Successfully installed pry-0.10.3
Fetching: nenv-0.3.0.gem (100%)
Successfully installed nenv-0.3.0
Fetching: notiffany-0.0.8.gem (100%)
Successfully installed notiffany-0.0.8
Fetching: lumberjack-1.0.10.gem (100%)
Successfully installed lumberjack-1.0.10
Fetching: formatador-0.2.5.gem (100%)
Successfully installed formatador-0.2.5
Fetching: guard-2.13.0.gem (100%)
Successfully installed guard-2.13.0
Fetching: http_parser.rb-0.6.0.gem (100%)
Building native extensions.  This could take a while...
Successfully installed http_parser.rb-0.6.0
Fetching: eventmachine-1.2.0.1.gem (100%)
Building native extensions.  This could take a while...
Successfully installed eventmachine-1.2.0.1
Fetching: em-websocket-0.5.1.gem (100%)
Successfully installed em-websocket-0.5.1
Fetching: guard-livereload-2.5.2.gem (100%)
Successfully installed guard-livereload-2.5.2
Fetching: git-1.3.0.gem (100%)
Successfully installed git-1.3.0
Fetching: asciidoctor-1.5.4.gem (100%)
Successfully installed asciidoctor-1.5.4
Fetching: awestruct-0.5.7.gem (100%)
Successfully installed awestruct-0.5.7
Parsing documentation for tilt-2.0.2
Installing ri documentation for tilt-2.0.2
Parsing documentation for netrc-0.11.0
Installing ri documentation for netrc-0.11.0
Parsing documentation for mime-types-2.99.1
Installing ri documentation for mime-types-2.99.1
Parsing documentation for unf_ext-0.0.7.2
Installing ri documentation for unf_ext-0.0.7.2
Parsing documentation for unf-0.1.4
Installing ri documentation for unf-0.1.4
Parsing documentation for domain_name-0.5.20160310
Installing ri documentation for domain_name-0.5.20160310
Parsing documentation for http-cookie-1.0.2
Installing ri documentation for http-cookie-1.0.2
Parsing documentation for rest-client-1.8.0
Installing ri documentation for rest-client-1.8.0
Parsing documentation for rack-1.6.4
Installing ri documentation for rack-1.6.4
Parsing documentation for parallel-1.8.0
Installing ri documentation for parallel-1.8.0
Parsing documentation for ast-2.2.0
Installing ri documentation for ast-2.2.0
Parsing documentation for ansi-1.5.0
Installing ri documentation for ansi-1.5.0
Parsing documentation for ruby-ll-2.1.2
Installing ri documentation for ruby-ll-2.1.2
Parsing documentation for oga-1.3.1
Installing ri documentation for oga-1.3.1
Parsing documentation for multi_json-1.11.2
Installing ri documentation for multi_json-1.11.2
Parsing documentation for little-plugger-1.1.4
Installing ri documentation for little-plugger-1.1.4
Parsing documentation for logging-2.1.0
Installing ri documentation for logging-2.1.0
Parsing documentation for ffi-1.9.10
Installing ri documentation for ffi-1.9.10
Parsing documentation for rb-inotify-0.9.7
Installing ri documentation for rb-inotify-0.9.7
Parsing documentation for rb-fsevent-0.9.7
Installing ri documentation for rb-fsevent-0.9.7
Parsing documentation for listen-3.1.1
Installing ri documentation for listen-3.1.1
Parsing documentation for haml-4.0.7
Installing ri documentation for haml-4.0.7
Parsing documentation for guard-compat-1.2.1
Installing ri documentation for guard-compat-1.2.1
Parsing documentation for thor-0.19.1
Installing ri documentation for thor-0.19.1
Parsing documentation for shellany-0.0.1
Installing ri documentation for shellany-0.0.1
Parsing documentation for slop-3.6.0
Installing ri documentation for slop-3.6.0
Parsing documentation for method_source-0.8.2
Installing ri documentation for method_source-0.8.2
invalid options: -SNw2
(invalid options are ignored)
Parsing documentation for coderay-1.1.1
Installing ri documentation for coderay-1.1.1
Parsing documentation for pry-0.10.3
Installing ri documentation for pry-0.10.3
Parsing documentation for nenv-0.3.0
Installing ri documentation for nenv-0.3.0
Parsing documentation for notiffany-0.0.8
Installing ri documentation for notiffany-0.0.8
Parsing documentation for lumberjack-1.0.10
Installing ri documentation for lumberjack-1.0.10
Parsing documentation for formatador-0.2.5
Installing ri documentation for formatador-0.2.5
Parsing documentation for guard-2.13.0
Installing ri documentation for guard-2.13.0
Parsing documentation for http_parser.rb-0.6.0
Installing ri documentation for http_parser.rb-0.6.0
Parsing documentation for eventmachine-1.2.0.1
Installing ri documentation for eventmachine-1.2.0.1
Parsing documentation for em-websocket-0.5.1
Installing ri documentation for em-websocket-0.5.1
Parsing documentation for guard-livereload-2.5.2
Installing ri documentation for guard-livereload-2.5.2
Parsing documentation for git-1.3.0
Installing ri documentation for git-1.3.0
Parsing documentation for asciidoctor-1.5.4
Installing ri documentation for asciidoctor-1.5.4
Parsing documentation for awestruct-0.5.7
Installing ri documentation for awestruct-0.5.7
Done installing documentation for tilt, netrc, mime-types, unf_ext, unf, domain_name, http-cookie, rest-client, rack, parallel, ast, ansi, ruby-ll, oga, multi_json, little-plugger, logging, ffi, rb-inotify, rb-fsevent, listen, haml, guard-compat, thor, shellany, slop, method_source, coderay, pry, nenv, notiffany, lumberjack, formatador, guard, http_parser.rb, eventmachine, em-websocket, guard-livereload, git, asciidoctor, awestruct after 71 seconds
Fetching: bundler-1.11.2.gem (100%)
Successfully installed bundler-1.11.2
Parsing documentation for bundler-1.11.2
Installing ri documentation for bundler-1.11.2
Done installing documentation for bundler after 5 seconds
Fetching: rake-11.1.2.gem (100%)
Successfully installed rake-11.1.2
Parsing documentation for rake-11.1.2
Installing ri documentation for rake-11.1.2
Done installing documentation for rake after 1 seconds
43 gems installed

Configuring Awestruct

At this point we should be able to create our project directory and initialize it with Awestruct, etc. Again the documentation is severely lacking background information, etc.

Create a project directory and place it under version control
  • Create your project directory : mkdir myproj

  • Change directory into it: cd myproj

  • Initialize version control for the directory: git init

Create your .gitignore

Consult: http://awestruct.org/auto-deploy-to-github-pages/ for details on what to put into your ignore files.

Install missing gem dependencies

Now in a perfect world, you should now be able to initialize your project with Awestruct without any further fuss. Well, that would be nice, but there is a good chance you’re still missing some dependencies.

So, lets go ahead and get those installed.

Awestruct dependencies are a bit of a chicken and egg problem. As part of the Awestruct installation, it generates a Gemfile which you can use with Bundler. The problem is you need that file (along with Bundler) before you can even initialize the project. In some use cases (such as where you are sharing a project with Github, then bundler probably makes sense. Otherwise, you’re stuck installing things manually using gem install. So, there you go. It is what it is.

After that nice little introduction, I’ll qualify things by saying this step may (or may not) be optional (depending on your use case). You could try initializing the project now to see what’s still missing. Only way you’ll find out is by giving it a try.

Alternately, you can just forgo all that by installing what might be missing right now (even if you end up adding some gems you’ll never use).

gem install htmlcompressor uglifier coffee-script therubyracer therubyrhino less sass bootstrap bootstrap-sass compass zurb-foundation

If you don’t install these first, you’ll get all sorts of errors when you attempt to initialize your project.

Initialize your project with Awestruct
awestruct -i -f bootstrap
Awestruct is capable of using either Bootstrap or Foundation as the CSS framework. For a comparison between the Bootstrap and Foundation frameworks, see here: http://blog.teamtreehouse.com/use-bootstrap-or-foundation

Because our project is using Bootstrap, we have specified it as the CSS framework during our Awestruct initialization.

If all goes well, you should see something like the following. If you get more errors, then it’s likely you are still missing additional gem dependencies and will need to install those too.

$~> awestruct -i -f bootstrap
Create directory: /home/mike/website/_config
Create directory: /home/mike/website/_layouts
Create directory: /home/mike/website/_ext
Create file: /home/mike/website/_ext/pipeline.rb
Create file: /home/mike/website/.awestruct_ignore
Create file: /home/mike/website/Rakefile
Create directory: /home/mike/website/stylesheets
Create file: /home/mike/website/Gemfile
   create config.rb

*********************************************************************
Congratulations! Your compass project has been created.

You may now add sass stylesheets to the stylesheets subdirectory of your project.

Sass files beginning with an underscore are called partials and won't be
compiled to CSS, but they can be imported into other sass stylesheets.

You can configure your project by editing the config.rb configuration file.

You must compile your sass stylesheets into CSS when they change.
This can be done in one of the following ways:
  1. To compile on demand:
     compass compile [path/to/project]
  2. To monitor your project for changes and automatically recompile:
     compass watch [path/to/project]

More Resources:
  * Website: http://compass-style.org/
  * Sass: http://sass-lang.com
  * Community: http://groups.google.com/group/compass-users/
Create file: /home/mike/website/_config/site.yml
Create file: /home/mike/website/_layouts/base.html.haml
Create file: /home/mike/website/index.html.haml
Create your .gitignore

Before saving anything using GIT version control, you first need to configure your ignore files.

Awestruct installs a file named awestruct_ignore, but you may need to make additional entries into it. Also, you’ll need to manually create your .gitignore file.

For details on how to complete these steps, consult: http://awestruct.org/auto-deploy-to-github-pages/.

Configuring the Gemfile for Bundler

When you initialized your project using Awestruct, one of the files it created was Gemfile. Bundler uses this file to manage Ruby gem dependencies (much like Vundle and other plugin managers are used to manage plugins for VIM).

Configure the Gemfile

Start by uncommenting a few things in Gemfile. A couple of fixes are required here as well. For example the line with bootstrap-sass was looking for the wrong version. To get things working I also had to add gem opal to the bottom.

For reference, here is a copy of my Gemfile.

# This file is a Bundler dependency descriptor file. Its purpose is to list all of
# the dependencies you are using to build your site. It is highly recommended you use
# this to keep your dependencies up to date and not cause conflicts with other gems
# already on your system.
#
# If you do not already have Bundler installed on your computer, run:
#
#  gem install bundler
#
# To use this dependecy file simply run:
#
#  bundle install
#
# We do recommend that you install the gems into another directory however, to ensure
# your awestruct site is pristine and isn't using versions of gems from other programs.
# To do this execute:
#
#  bundle install --path .bundle
#
# More information about Bundler and its other commands can be found at http://gembundler.com/.
# To add other dependencies for your awestruct site simply follow the same pattern as you'll
# find below. To make use of dependecies listed here, simply remove the '#' from the start of
# the line to uncomment the dependency. We hope you enjoy using Awestruct!

source 'https://rubygems.org'                             # This tells Bundler where to look for gems

gem 'awestruct', '>= 0.5.7'                               # Goes without saying
gem 'webrick', '~> 1.3.1'                                 # The rack webserver to use in dev mode

gem 'bootstrap-sass', '>= 3.2.0.2'
gem 'compass', '>= 1.0.1'

# FIXME
gem 'rake', '>= 0.9.2'                                  # Needed for the Rakefile to work
# gem 'coffee-script', '>= 2.2.0'                         # If using coffee-script or to remove the warning
# gem 'rb-fsevent', '~> 0.9', :require => false           # to remove warning about pulling, Mac OSX
# gem 'rb-inotify', '>= 0.9.0', :require => false         # to remove warning about pulling, Linux
# gem 'wdm', :platforms => [:mswin, :mingw], :require => false # to remove warning about pulling, Windows (ruby 1.9+)
# gem 'rb-fchange', '~> 0.0.6', :require => false         # to remove warning about pulling, Windows (ruby 1.8.7)
gem 'therubyracer', '>= 0.10.0', :platforms => :ruby       # Javascript runtime on mri (needed for LESS and coffee-script)
# gem 'therubyrhino', '~> 2.0.2', :platforms => :jruby    # Javascript runtime on jruby (needed for LESS and coffee-script)
# gem 'less', '>= 2.2.2'                                  # If using LESS instead of sass
# gem 'org-ruby', '>= 0.8'                                # If using Org-Mode
# gem 'RedCloth', '>= 4.2.9'                              # If using Textile
gem 'asciidoctor', '>= 0.1.1'                           # If using AsciiDoc syntax, need 0.1.1 for Header support
# gem 'slim', '>= 1.3.6'                                  # If using slim instead of haml
# gem 'kramdown', '>= 0.14.2'                             # If using Markdown
gem 'uglifier', '>= 1.3.0'                              # If using the minify transformer
gem 'htmlcompressor', '>= 0.0.3'                        # If using the minify transformer
gem 'opal'
Run Bundler to install the dependencies listed in the Gemfile
bundle install

Again, this is what I saw it do on my system running Linux Mint 17.3:

$~> bundle install
Fetching gem metadata from https://rubygems.org/.......
Fetching version metadata from https://rubygems.org/...
Fetching dependency metadata from https://rubygems.org/..
Using rake 11.1.2
Using ansi 1.5.0
Using asciidoctor 1.5.4
Using ast 2.2.0
Installing execjs 2.6.0
Using git 1.3.0
Using formatador 0.2.5
Using rb-fsevent 0.9.7
Using ffi 1.9.10
Using lumberjack 1.0.10
Using nenv 0.3.0
Using shellany 0.0.1
Using coderay 1.1.1
Using method_source 0.8.2
Using slop 3.6.0
Using thor 0.19.1
Using eventmachine 1.2.0.1
Using http_parser.rb 0.6.0
Using guard-compat 1.2.1
Using multi_json 1.11.2
Using tilt 2.0.2
Using little-plugger 1.1.4
Using mime-types 2.99.1
Using parallel 1.8.0
Using rack 1.6.4
Using unf_ext 0.0.7.2
Using netrc 0.11.0
Installing sass 3.4.21
Installing chunky_png 1.3.5
Installing concurrent-ruby 1.0.1
Installing hike 1.2.3
Installing htmlcompressor 0.3.0
Installing libv8 3.16.14.13
Installing sourcemap 0.1.1
Installing ref 2.0.0
Installing webrick 1.3.1
Using bundler 1.11.2
Using ruby-ll 2.1.2
Installing autoprefixer-rails 6.3.5
Installing uglifier 3.0.0
Using rb-inotify 0.9.7
Using notiffany 0.0.8
Using pry 0.10.3
Using em-websocket 0.5.1
Using haml 4.0.7
Using logging 2.1.0
Using unf 0.1.4
Installing compass-core 1.0.3
Installing compass-import-once 1.0.5
Installing sprockets 3.5.2
Installing therubyracer 0.12.2 with native extensions
Using oga 1.3.1
Installing bootstrap-sass 3.3.6
Installing listen 3.0.6
Using domain_name 0.5.20160310
Installing compass 1.0.3
Installing opal 0.9.2
Using guard 2.13.0
Using http-cookie 1.0.2
Using guard-livereload 2.5.2
Using rest-client 1.8.0
Using awestruct 0.5.7
Bundle complete! 10 Gemfile dependencies, 62 gems now installed.
Use `bundle show [gemname]` to see where a bundled gem is installed.
Post-install message from compass:
    Compass is charityware. If you love it, please donate on our behalf at http://umdf.org/compass Thanks!

As you can see, some of these gems were already installed. Others were missing and were downloaded and installed.

Using rake

At this point (assuming all dependencies have been satisfied), we should be able to launch our Awestruct website.

While it’s possible to directly use the awestruct command to perform various tasks (e.g. serve the site in development mode, deploy it, etc.), it’s easier to use rake for this purpose. For more details about rake see: http://awestruct.org/getting_started/

This page describes several rake tasks (things it can do). There is a fair bit of complexity to all this.

To get things moving, we’ll launch Awestruct in development mode.

rake clean preview
If you received any errors when running rake clean preview, you might need to add some 'requires' to _ext/pipeline.rb I did not have any errors caused by this, but added require 'asciidoctor' as I intend to use Asciidoctor for my text markup.

After fixing all the missing requires and installing any remaining missing gems, etc., you should now get something that looks like this:

$~> rake clean preview
Running command: bundle exec awestruct -d
Generating site: http://localhost:4242
Executing pipeline...
***************************************************************************
Starting preview server at http://localhost:4242 (Press Ctrl-C to shutdown)
***************************************************************************

[2016-03-27 17:56:22] INFO  WEBrick 1.3.1
17:56:22 - INFO - LiveReload is waiting for a browser to connect.
[2016-03-27 17:56:22] INFO  ruby 2.3.0 (2015-12-25) [x86_64-linux]
[2016-03-27 17:56:22] INFO  WEBrick::HTTPServer#start: pid=28187 port=4242

To preview the site in development mode, open your web browser to http:://localhost:4242.

Congratulations

If you have gotten this far, that’s quite an achievement. However, this is just the very beginning of a very long journey.

The URL above is based on using foundation, not bootstrap. Even so, you’ll find something useful in following it. You may also want to read up on the various extensions, etc.

Add a CSS theme

At this point the website does not look like much. To make the site look better, we need to add a CSS theme.

Visit http://bootswatch.com/ and pick a CSS theme.

Once you find a theme you like, download the bootstrap.css and rename it styles.css. Copy this file to your project/stylesheets directory.

Now shut down the site using (CTRL + C) and reload it once more using rake clean preview.

Ah…​.now that looks much better.

Save the state of the website using Git version control

Shut down the site once more using (CTRL + C) and perform a rake clean.

Perform a git add --all followed by a `git commit -m 'Fresh Awestruct build'.

For assistance using GIT, have a look at the tutorials found on GitHub.

Go Forth and Conquer!

You now have a functional Awestruct static website up and running in development mode. To learn how to use it, you may want to read up further about the various technologies used in Awestruct. You’ll be well advised to read up about using the Bootstrap CSS framework as well. And if you’re new to GIT, read about that too.

You can create your pages using pure HTML, or alternately you may wish to use a text based markup such as Markdown or Asciidoctor. If you have questions, visit the respective sites and Google, Google, Google until you find the answers.